Click the subject below to go directly to specific instructions:
How to add your images:
Step 1: Start off by going to – https://www.photopea.com/
Step 2: Click on “Open from computer”
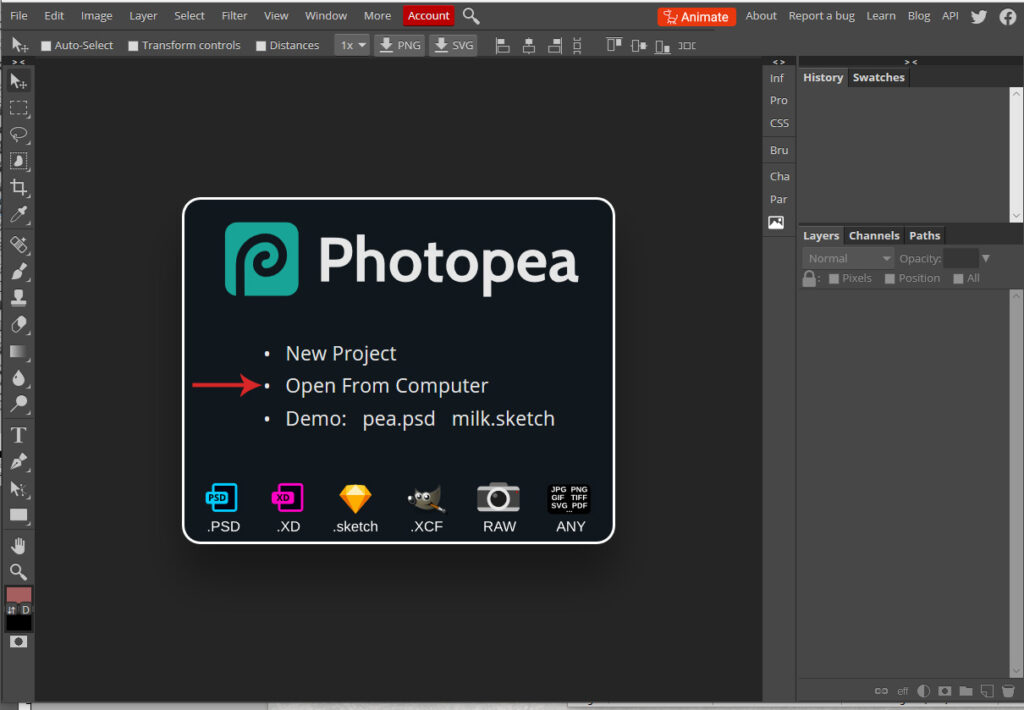
Step 3: Navigate to where you saved the download and open it up. Make sure you open the file that starts with “PHOTOSHOP”. You will immediately see the mockup file and your workspace. To the right of the screen you should see the layer list.
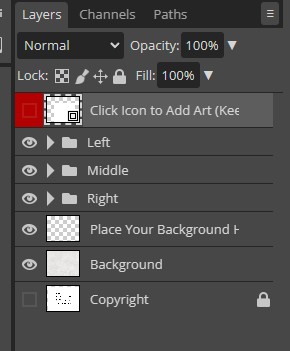
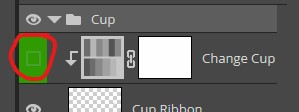
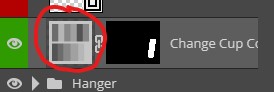
Step 4: In the layer list, there should be a red highlighted layer that says “click icon to add art”. If you do not immediately see a red layer that says “click icon to add art” check to see if there are layer folders. You will want to expand the folder by clicking on the little arrow that is to the left of the layer folder’s name. These are folders just like on your computer that hold all of the layers that make up each item in the mockup. Layers with Red are going to be your smart object layers, while green layers indicate you can change the color in the image. Each layer is clearly labeled so you know what each one is for.
Note – If you do not see a red “click icon to add art” layer anywhere, you may have the wrong file version open. Make sure to use the .PSD that starts with “PHOTOSHOP”
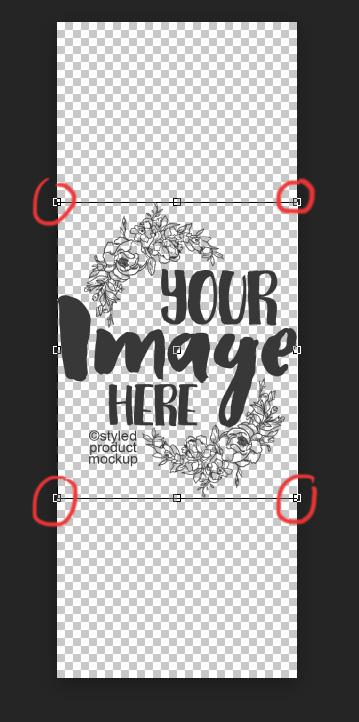
Step 5: To add your image, find the red layer and double click with your mouse anywhere inside the circled area in the image below.
Step 6: This will pop up a new window.
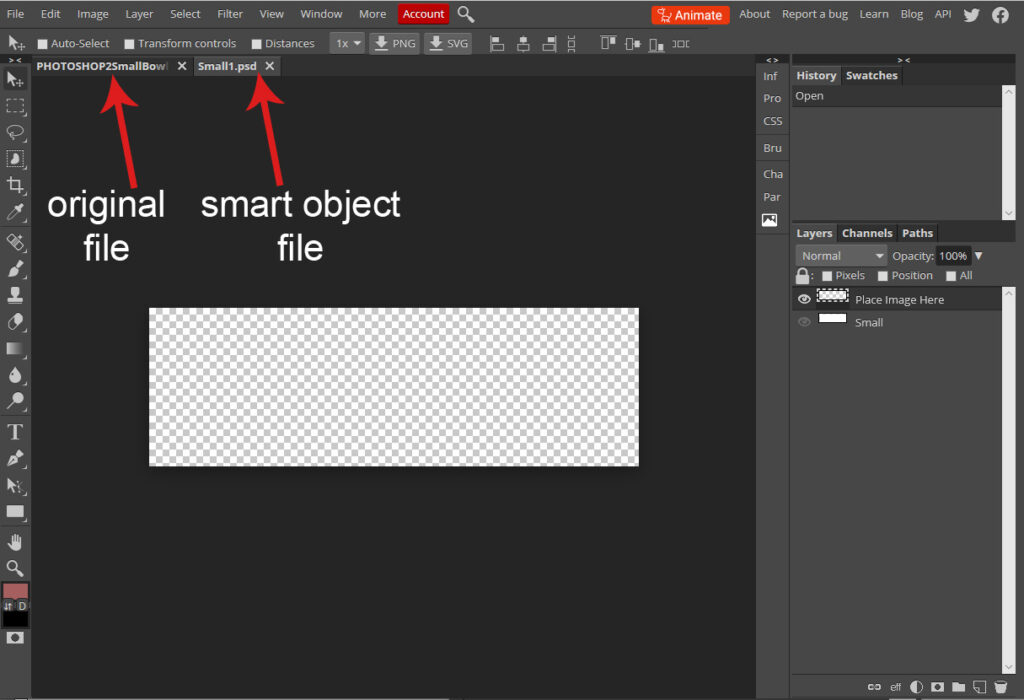
Step 7: With this new document that opened still active, click on “File” and then “Open & Place…” Locate the file you want to add to the mockup and select it.
This will place your image into the smart object. (If a 3rd window popped up with your image in, you will need to check your internet browser and make sure it is up to date, or try a different one like Firefox).
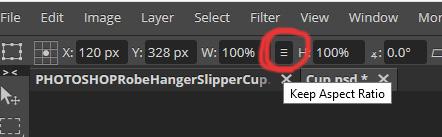
Step 8: When your image is placed into the document, you will see a box around it. You can re-size your image as needed to fit by clicking and dragging any one of the 4 corners.
TIP – If you click the little box that is in between the W and H (circled in red below). It will keep the aspect ratio of your image, so you don’t have to worry about “squishing” it while re-sizing.
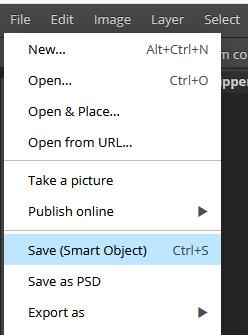
Step 9: When you are happy with your image’s placement go to File > Save (Smart Object):
Step 10: Click back over to the original Photoshop file and your image should be placed onto the product.
How to change colors (hue/saturation):
Step 1: If you see a green highlighted layer that says “change color” and it has a different looking icon on it, that is a hue/saturation adjustment layer. If you do not see this icon, skip to the section below for the other methods of changing the color.

NOTE: This color layer may be turned off by default. If you don’t see the little eye inside the green area, click to turn it on.
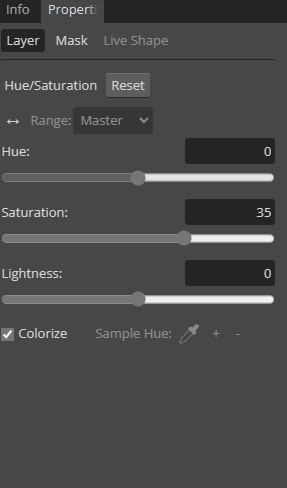
Step 2: Double click on the grey line icon (circled below) to bring up the hue/saturation adjustment panel.
Step 3: This window will allow you to change the color of the product when you move the sliders to the left and right. Hue changes the overall color, Saturation changes how vibrant the colors is and Lightness changes how light or dark the color is.
How to change colors (fill layer):
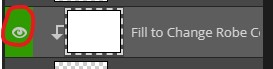
If you have a green highlighted layer that says “FILL to change color” you will need to fill the layer.
Step 1: Start by selecting the green “Fill to change Color” layer.
Also make sure that they layer is turned on, by clicking on the eye icon in the green area if you don’t see it.
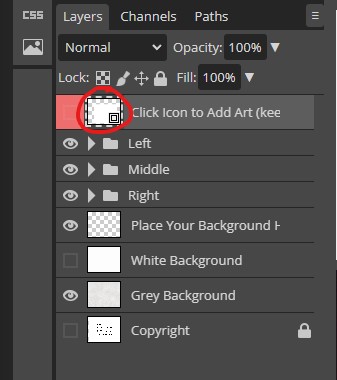
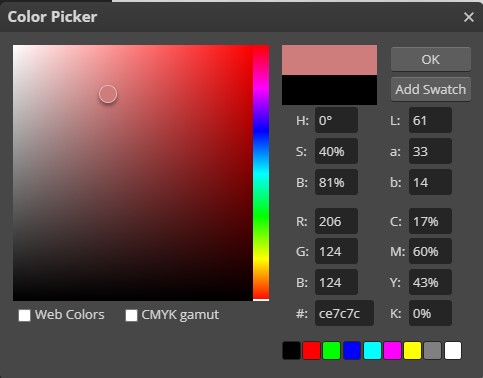
Step 2: To change your color, look to the left of your screen. Towards the bottom of the tool list, you will see 2 rectangles with color in them. The top color (circled in red below) is the one you will want to change. Click on the top color to bring up the color picker.
Step 3: Click anywhere on the spectrum to change the color picker to your desired Hue, then click inside the box to change the color. Click OK when you are done.
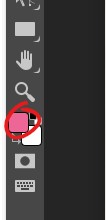
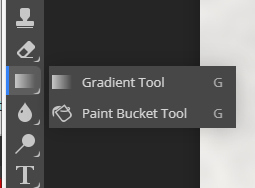
Step 4: Select the paint bucket tool. It may be hidden under the gradient tool. If you click and hold the gradient tool, the menu will fly out so you can select the paint bucket tool.
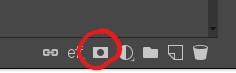
Step 5: With the paint bucket tool selected and your color chosen, make sure the “fill to change color” layer is still selected and click anywhere over top of the image to fill in the layer with your color.
How to add your own background:
Step 1: Locate the layer at the bottom of the layer list that says “Place your background here” and select it.

Step 2: Go to File > Place embedded. Select the background you want to add and click place. Resize as needed.
Additional Tips and Tricks:
The following are some additional trips and tricks to help work with the files.
Working With Raster Masks:
You may have a file with a raster mask instead of a clipping mask. These are usually used for the clear glass or acrylic products. They are also used with some of the laser etched products (click here for the metal laser tutorial). A raster mask will have an extra icon next to the layer that your image goes into:
![]()
Generally, you shouldn’t have to worry about resetting the mask, but if you want to move around the layers, the mask will stay in place, so you may have to reset it. In order to re-set, you can right click on the layer mask and then click on “delete raster mask”. I usually keep a layer just below the image area that is called “clipping area”. This will allow you to make a selection and re-create the mask.
To make a selection of the layer, right click on the layer’s icon and then click “select pixels”.
Select the image layer, then click on the raster mask icon at the bottom of the layer list to re-create the mask.
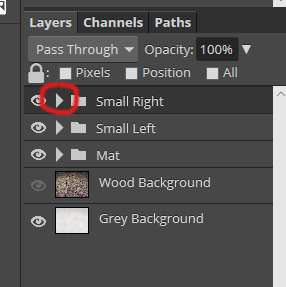
Adjusting Smart Object Image Sizes:
If you find that your template images don’t exactly match the dimensions of the smart object, you can make adjustments so the smart object fits your image dimensions.
While inside the smart object, place your image in. If you do File > Open and Place… it will re-size your image to fit the available space without cutting anything off. In this case, my image is too small on the left to right:
This is an easy fix though. You can take the crop tool and crop out the extra space on the left and right.

Hit enter on your keyboard once you have cropped out the extra area. Save the smart object as usual and when you go back to the main file, the smart object should have updated to the new space.
Duplicating Smart Objects:
Sometimes, you may want to duplicate the product to show a set. This is easy to do, you just need to select all of the layer and make a copy of them. But, when you make a copy of a smart object, it is going to make a new instance of the smart object, which means it will show the same image. If you want to show different images in your set, all you need to do is right click your new smart object then click on smart object > “new smart object via copy”. This will make a new instance of the smart object so you can show different images on each copy.